
It's done! I'm ridiculously excited about sharing this project. We've been working on ideas for DIY Canvas Art for a long time. We knew we wanted to do a huge quote but weren't sure which quote we would end up using. Of course, we seriously considered many, many Nacho Libre quotes, but settled on this one, "We are the music makers, and we are the dreamers of dreams."
Do you know where this quote is from?! Well, originally it is from a poem by Arthur O'Shaughnessy. (Sweet name, dude.) But we love the movie that made it famous. We also love that this quote will be a reminder to Will, (and to us, of course), that our lives can only be as amazing as we dream them to be.
**Okay, now recognizing that this post is insanely long... I'll find a way to shorten my posts... in the future... eventually...

Click through for the looonnngg thorough tutorial...
We started with a basic 9'x12' canvas drop cloth from Harbor Freight (Love love that store. Quality...not so much. But cheap- yes!). It came as two panels (6'x9') that are already sewn together, so we seam-ripped those puppies apart.

Well, I would have used my seam ripper... but it's lost to the baby-dom that is our home. So I used some small scissors. It was sewn really tight, so while it wasn't difficult, it took a while. At one point I gave up and tried ripping the seams but ended up with a small hole in the canvas. Moral of that story: just stick to the scissors, (or better yet, a seam ripper if you have one. Really, everything gets lots in our house. My phone was lost all morning because Will put it in the dishwasher... So it would be a miracle to find the seam ripper again.)

Will, getting in on the action, still in his Santa PJ's.

Once the panels were separated, we tested out (roughly) the size on the wall. **Note: The canvas will shrink a fair bit so take that into account when testing for size** Nice and huge, just like we want it. We also noticed that the canvas color didn't offer much (or any) contrast to our wall color, (Tapestry Beige by Benjamin Moore), so we knew we'd want to alter the color.

Willister approved.

Then we built a frame to fit the canvas. We built our frame in the basement, (our current work area and workout area), but then realized that it wouldn't fit around the corner to go up the stairs... Whoops. So take into account the doorways and corners in between your workspace and where your canvas will go. If it won't fit, then wait to assemble it in the actual room.
We used 2x2x8's from Home Depot to build the frame. Each one costs just under $2. They were a bit twisted, but it didn't really matter in the end. We needed 4 for the size of our project.
*Note, this is a really unsophisticated and not-so-quality-not-so-stable frame. But we weren't going for perfection. See youtube for some advanced techniques and additional ways to build in support.
Step 1 - We figured out how big we wanted our DIY canvas to be by laying it out. We cut down two 2x2's to get the dimensions we wanted. Our DIY canvas measured about 8' by 5' (yeah, it's big).

Step 2 - We made sure everything was square.

Step 3 - We made sure the canvas had at least 3 inch borders on each side so that we'd be able to wrap it around the 2x2 frame.

Step 4 - We busted out the old staple gun, wood screws, and countersink drill bits. Nothing fancy.

We used 2 1/2" wood screws from Walmart. They cost $.97 each bag of seven. Countersink bit shown on the left.

Step 5 - We used a staple gun to provide pre-drilling support.

Step 6 - We then used the countersink drill bit and drilled into the 2x2 corner. The countersink drill bit creates a nice little nesting hole for the screw head so the surface will remain flush. If you don't have a countersink bit, no worries, just use a bigger drill bit to create a bigger diameter shallow hole. We finished up by screwing in the wood screw.

The frame took about 30 minutes to build. Tack on another 15 minutes for taking the frame apart to get it up the stairs for reassembly (common sense failure... not our first and certainly not our last). We put the frame back together in the dining room. It's awfully handy to have a dining table-less dining room sometimes...

And then we rechecked the fit on the wall. Yes! It's huge! Yes! We love it!

Next it was time to dye the fabric. We decided to do a black canvas with light-colored words. We toyed with the idea of painting the drop cloth, but settled on using Rit Dye because it would be simpler and cheaper with less cleanup. (Plus, who wants to clean out a paint roller when they don't have to?!)
We originally had a serious failure with the Rit Dye (an embarrassing, messy failure)... but I'll post about that one later...

We started by wetting the entire drop cloth. This was a little tricky because the fabric resisted water and, well, it's huge. I wet it down in pieces, spraying sections down with the kitchen sprayer and then bunching the wet stuff in the sink. We wanted everything equally wet so that the dye would take to the fabric evenly. When it's all wet we put it all in the washer. It was also important that the canvas was as un-folded as possible (that's certainly a word). Because the canvas is so big, it's easy to have folds that will end up looking tye-dyed if you're not careful.

Next, we mixed up the dye. We used three packets of black powder Rit dye. It comes in lots of colors and you could always combine a few packets of different shades to create a color yourself. These each cost $1.66 at Walmart. You can also get Rit in liquid form, it works just as well but tends to be a little more expensive (maybe $2.50 a bottle?).

We filled a bowl (although only got a picture of a cup...) with hot water. We didn't measure it, but it was probably something close to 6 cups of water. (This is where you might want to put some rubber gloves on.) Then we poured the powder in and mixed it up, (with something that won't get dyed. We used a fork. Super kosher... maybe.)

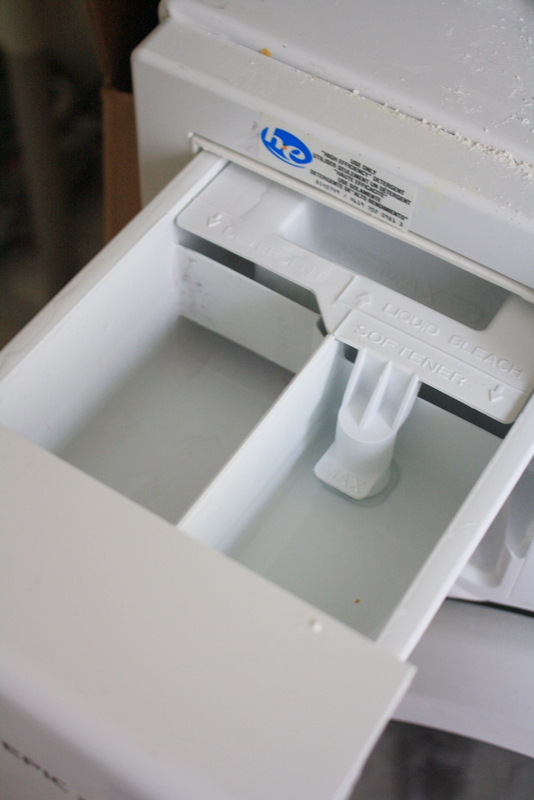
Back in the laundry room, we started the washer. We ran our front-loader on a rapid wash cycle (it's a 30 min. cycle) on the hottest water option. When the water started to fill the detergent dispenser, we poured all of the dye in slowly. Then we rinsed out the detergent dispenser with a few cups of hot water.
Beware of babies coming in to spill scary black dye, and make giant messes in general. (This picture, taken in my ridiculously messy laundry room, was taken during the first, failed attempt at dyeing the drop cloth. Ignore the 47 min. timer.)

When the cycle is done: TADA! We pulled the fabric out and it was a much better color than the first attempt. If you don't like the color, you can always re-dye it. Even with a rinse cycle, there's a good chance that the fabric could still transfer some dye, so don't set it on a white sofa or anything...
With the fabric dyed and the frame built, we were ready to stretch the canvas around the frame. We laid down another drop cloth beneath our work surface. It didn't cover the entire area, but helped protect the carpet from dye-age.

Then the stretching began. Our drop cloth shrunk up considerably in the washer: we're talking a foot short of it's goal length-wise... But since we'd already failed on the first drop cloth, we decided it was worth putting in some serious elbow grease to try and make it work before throwing in the towel (or should I say throwing in the drop cloth?). We spent five minutes or so pulling as hard as humanly possible to get that thing to stretch back out. And while it made our hands purple and super tired, it worked. We barely had enough fabric to cover the frame. (This is where we go back to measuring your frame. Give yourself more than 3 inches on each side. Your dainty hands will thank us later.)

We started with one of the short sides. We measured the middle of the side (32.5" on our frame) and made a mark with a fingernail.

Then we folded the canvas in half (to find center), wrapped the canvas underneath the frame, and stapled middle to middle.

Here's where the teamwork really kicked in. We knew it would barely stretch across the width of the frame, so Grant pulled (as hard as he could) towards one end while I wrapped and stapled. We stapled the very edge of the canvas to the very edge of the frame, but used lots of staples to make sure it would hold.

When we got to a corner, we folded it like a Christmas present. Push the fabric flat up against the frame, allowing for a doggie ear to form. Staple.

...And then fold the doggie ear up as tight as you can. Staple.

We then worked our way down the long sides with the same technique. Grant pulled lengthwise while I wrapped and stapled.

We alternated sides about every foot or two. (Follow below: A, B, C, D) We would pull, wrap and staple maybe six-eight times, and then switch sides, kind of shimmying down the canvas, alternating sides and pulling as tight as we could every time.


Then we shimmied toward one corner at time, with Grant pulling the corner of the fabric at a diagonal while again, I wrapped and stapled. We did the corners in the same way.

And voila! A canvas is born. Because the fabric was wet when we attached it to the frame, it was able to stretch better, and even shrunk up and tightened a bit when it dried. We were really pleased with how it turned out. The color is a little uneven, and looks a bit like a used chalkboard. And somehow, we got lucky, and Will's not terribly interested in it (score!).
As a side note, because the fabric was so tight, and probably because the wood was already compromised a bit, the frame bowed a little under the pressure of the canvas. We toyed with the idea of adding a cross bar for support, but decided against it because of the weight that the support would add. Still hoping we made the right decision...

But anyway, on to the next step: printing out the transparency. As we talked about here, we purchased an overhead projector for this project. If you don't have an overhead projector, you can always draw free-hand, or even purchase or make stencils to create your quote.
We fashioned our quote on photoshop, which has awesome tools for manipulating text. We decided on Frenchy, (my new favorite font), that you can download here.
We fashioned our quote on photoshop, which has awesome tools for manipulating text. We decided on Frenchy, (my new favorite font), that you can download here.

After a few printing attempts, we realized that the printer wouldn't recognize a clear transparency.

So we attached a clear sheet of paper to the transparency with tape. You're gonna need more tape than this picture shows or the printer will pull the transparency and leave the paper behind, aka, no no bueno. Use three pieces of tape on each side of the paper, with tape close to each of the corners to avoid printer crunch-ups.

After some additional tapings, it worked out great. We made some changes to our design before we applied it to the canvas. The final print out that we used can be found here. Feel free to use it in your own home. For freeeee!!

Once the canvas was totally dry (we waited overnight), we set up the overhead projector and got the quote right where we wanted it. This involved moving the projector around, and most importantly, getting it exactly centered with the canvas. We just leaned the canvas up against the wall for the quote transfer.

Once it's in place, we taped down the transparency. (We did all this while Will was sleeping to avoid any busy toddler projector bumping.)

Then we simply took a piece of chalk and outlined all of the letters.


So that when the projector was gone, (or your giant head covers the light...), the outlines would remain.

We were stoked when this step was finished. I don't mind it just as an outline, in fact. It makes me dream of amazing chalkboard projects (and if it's just tracing involved, I actually feel like I could accomplish them...).


But we left behind our chalky beauties, and painted it all in. We just used some white latex paint leftover from a dresser refinishing project. First we re-outlined the chalk:

And then filled in the outlines:

Because we had slightly different techniques, the letters didn't look super uniform.

So we went back over a few of the lighter letters with a light hand to even things out a bit. Worked like a charm. The entire painting process took a few hours with both of us working. It would definitely go faster with stencils, but we were still happy with our results from the projector. We also feel like we saved a bundle by purchasing a machine we can use over and over instead of buying expensive stencils that would get little use in the future. Using the projector instead of stencils also gave us a lot more creative control over the project. We spent a good amount of time on the computer trying out various fonts, spacing, etc., and wouldn't have been able to do that with a stencil.

Next, it was time to attach the finished product to the wall. We decided to use a french cleat to hang the canvas. French cleats are easy to make out of any wood, (although you can also buy metal versions), and are super strong.
Essentially, a french cleat is made by cutting one piece of wood at a 45 degree angle. Two pieces of wood are left. One is attached to the frame and the other to the wall. You simply line up the two pieces of wood so that the angles match up and those angles keep the frame in place. (We may do a more detailed post about French Cleats later).


We made one french cleat for each side of the frame, attaching it with a kreg jig.

Then we measured out where to put the frame on the wall. (Basically, just held it up, eyeballed it, made pencil marks. We're chill like that.)

One side of the frame lined up with a stud. We drilled the french cleat on that side straight in. On the other side, we used an anchor to reinforce the drywall.


And then we hung that sucker on the wall! We just lined up the french cleats and it slid right on. (One side ended up a little lower than the other so we shoved a piece of paper in between the cleats. Worked like a charm.)

And so you can get a sense of the scale of this puppy, here are my two babies next to our finished product:

What do you think??
Supplies:
9x12 drop cloth: (you will need 1/2 of it. We used this one.) We got ours for $10 or so on sale.
2x2's: 2 cut down to 5', 2 left a stock length of 8' (Easily found at Home Depot, Lowe's, etc.) Under $2 each for a total of $8.
4 wood screws: $.97 at Walmart for bag of 7.
Staple Gun: already on hand.
Rit Dye (If you want to change the color. We used 3 dry packets, but you can always use less if you want a less concentrated color.) $1.66 each at Walmart, total $5.
Overhead Projector: (Optional. You can always free hand your design, use a stencil, get creative!) $60 form Craigslist
Transparency Sheet (You can copy our quote exactly but printing this as a transparency.) Came with projector.
Chalk (To sketch/trace your quote) already on hand.
Paint for your quote/design (We used leftover white paint from refinishing one of Will's dressers. We did not add a fabric medium, because with the canvas stretched tight, we don't need it to flow like fabric after it's painted.)
Wood scraps for your french cleats (or buy metal ones from the store) and 4 screws to hang canvas.
Total cost of project: $85. Would have been $25 if we could have borrowed a projector from someone.


This is such a great idea! It turned out really well.
ReplyDeleteThanks Betina! We can't wait to see that little Mann baby!
ReplyDeleteCute Kelsey! You are super talented.
ReplyDeleteSeriously, you guys are amazing. One day I will live in my dream house, which is identical to yours :)
ReplyDeleteHah- thanks Steph! Hope you guys are doing well-- can't get over your cute cute kids.
DeletePS that was Kelsey :)
DeleteWow! What a great project. And I love the detailed DIY instructions. Big scale artwork is wonderful!
ReplyDeleteThanks so much Gabrielle! I agree. I feel like I want everything in my house to be HUGE now!
DeleteI was looking for DIY canvas project and come across this post, you have done great work, nice to see it. Many thanks for sharing.
ReplyDeletehttp://canvasart.jigsy.com/
It's really an awesome project, you did hard work for making this wide canvas art, i love it, the procedure you shared of this great project it's really enjoyable thanks for sharing...
ReplyDeleteThe shading bonds well with the surface, and henceforth it holds for a more noteworthy timeframe. Henceforth, a unique canvas workmanship remains for various years. Fineart
ReplyDeleteI was looking for a DIY canvas project and I found your blog and you gave me inspiration on how to build my DIY canvas project. Thanks for sharing!
ReplyDeleteWorld Map Canvas Art